Nikon Advertisements
If you use a compact camera, chances are you don't agonize over choosing the best neck strap for your camera. You install the one that came with the kit and you are good to go. The same choice is not always so simple with big, black SLRs. Not only are the cameras large, but with battery grip and telephoto lens, quite heavy indeed.
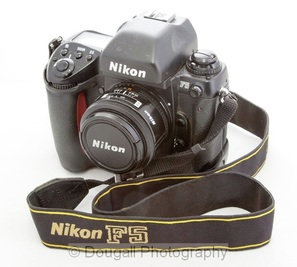
Most camera makers do give you a neck strap as part of the entry price into your new camera, but they spend more time designing the placement of their logo rather than ensuring you have a comfortable fit. These straps usually consist of a black nylon or canvas strap with hard edges and little "give" or flex to the material.
Back in the day, the straps were even worse as they were made of very thin nylon webbing with a movable (always in the wrong place) rubber shoulder pad. Thankfully, there a better choices today!
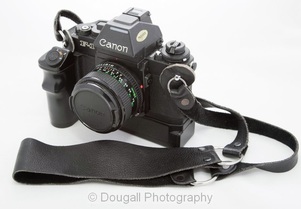
Canon F1n with leather strap
Camera straps are a lot like camera bags - some photographers are always on the search for the perfect one. In my ongoing search for the perfect camera strap I look for certain characteristics: softness, flexibility, "give" in the strap that allows it to stretch under load, a quick release mechanism to remove the strap, and metal hardware for long wear (I keep my straps for years and move them from camera to camera).
Years ago I gave up on manufacturers' straps and vowed that I would not provide free advertising of my cameras to potential thieves. I began replacing my uncomfortable corporate neck straps with wide, soft leather "field straps" made by Globus Inc, a company that doesn't seem to be around any more. These straps came in brown or black, had a wide, soft neck pad, gave a little when slung around the neck and had metal hardware. I purchased a number of these in the late 70's and still use them today on some of my cameras. The only downside is that they are made of such soft leather they don't stay on my shoulder. I have developed a habit of holding the strap part way up and pressing it against my body to hold it in place. I have done this for so long that I don't even notice anymore and the camera never moves as I walk.
Years ago I gave up on manufacturers' straps and vowed that I would not provide free advertising of my cameras to potential thieves. I began replacing my uncomfortable corporate neck straps with wide, soft leather "field straps" made by Globus Inc, a company that doesn't seem to be around any more. These straps came in brown or black, had a wide, soft neck pad, gave a little when slung around the neck and had metal hardware. I purchased a number of these in the late 70's and still use them today on some of my cameras. The only downside is that they are made of such soft leather they don't stay on my shoulder. I have developed a habit of holding the strap part way up and pressing it against my body to hold it in place. I have done this for so long that I don't even notice anymore and the camera never moves as I walk.
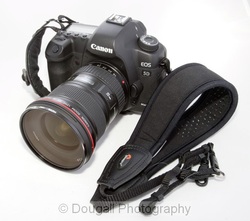
E-1 hand strap and Lowe-Pro neck strap
More recently I have been using Lowe-pro neoprene straps (model 2070910) that have many of the same characteristics as my beloved leather ones. Again, these are soft straps with the natural give in them to allows for flexing and stretching when under a heavy load. They have metal hardware and a separate piece of strapping that attaches between the camera and the neck strap. The strap itself is then connected by quick release rings making it easy to detach the strap for storage or when it's not needed. The neoprene neck pad has small "nubbies" on the underside that keep the strap in place on my shoulder.
When wouldn't I need a neck strap? When using a hand strap of course! I attach a Canon E-1 hand strap to all my cameras and then hook the neck strap to the E-1. When I am carrying a long telephoto for an extended period of time it is far easier to hang the camera and lens off of my hand rather than my neck. When I am doing this, I remove the neck strap (via the quick release) so it doesn't drag on the ground.
As the Lowe-pro strap has now been replaced with newer versions that are not as flexible for my liking, the new Custom SLR Split Camera Strap from B&H Photo may be a good replacement as it appears to be flexible, non-slip and complete with a removable neck pad.
If you're finding that your neck strap won't accommodate the weight of your camera and lens or it just isn't flexible enough, begin your hunt for the world's best camera neck strap (or hand strap) - it may just make it easier to carry your camera more comfortably for longer periods of time.


 RSS Feed
